Their Meta Business Account must have a verified status. Click here to learn more on META platform.
Their existing WABA must have a status of approved.
Their existing WABA must have a valid payment method attached (in Payment Settings).
Their business phone number must have two-step verification disabled. Customers who own their WABA can use the WhatsApp Manager to disable two-step verification on their number.
For any inquiries on these pre-requisite settings, kindly reach out to META for further assistance.
2. Click the “Settings” icon on the left side of the screen.
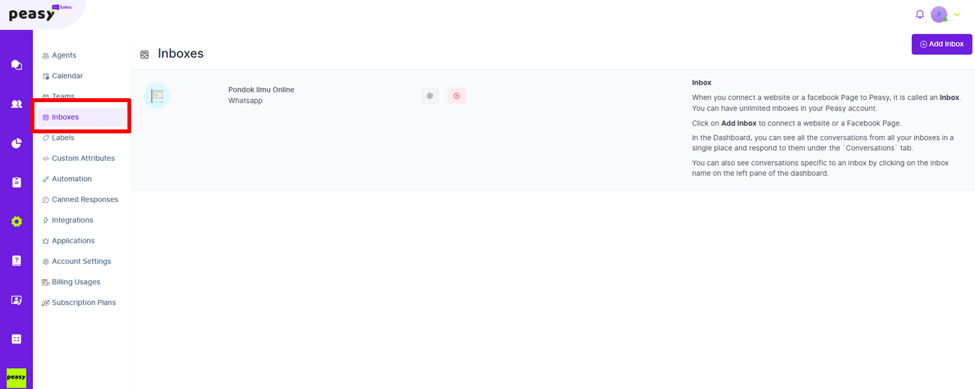
3. Click “Inboxes”
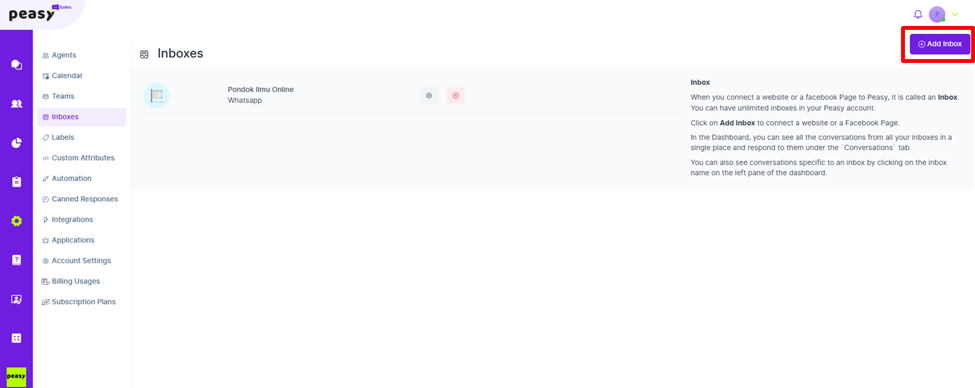
4. Click “Add Inbox” on top right corner of the screen.
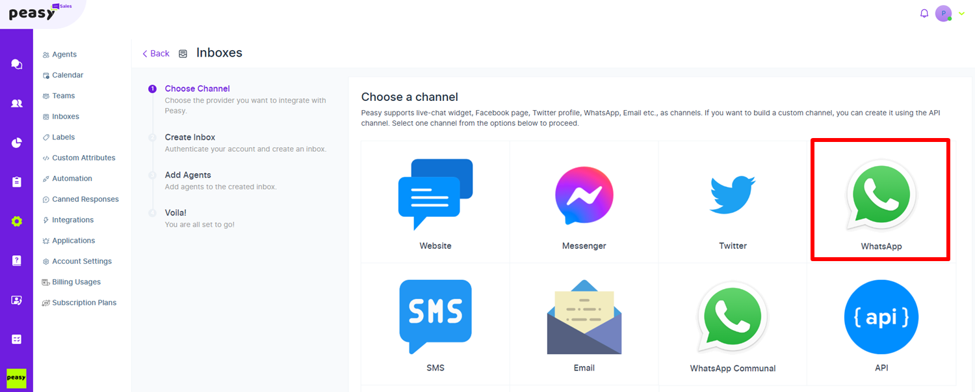
5. Click “Whatsapp”.
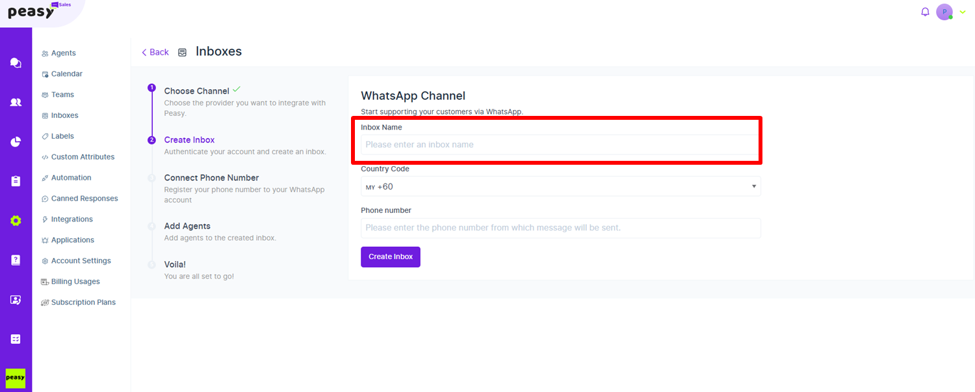
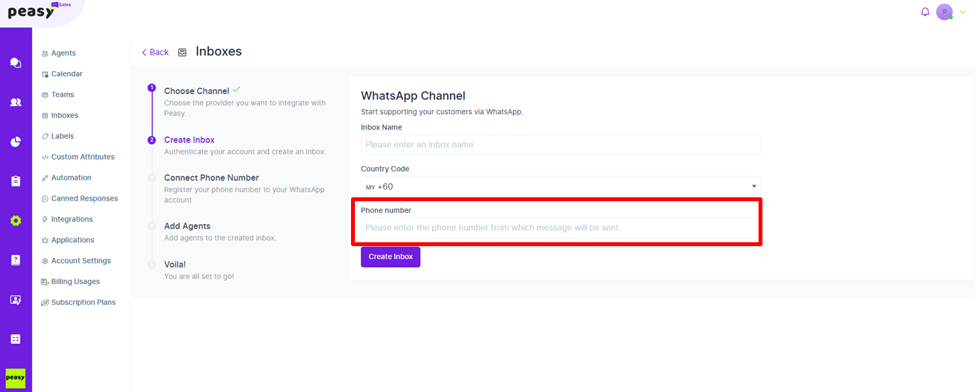
6. Insert your intended Whatsapp name inside the box for “Inbox Name”.
7. Insert your intended Whatsapp number for this setup inside the box for “Phone Number”
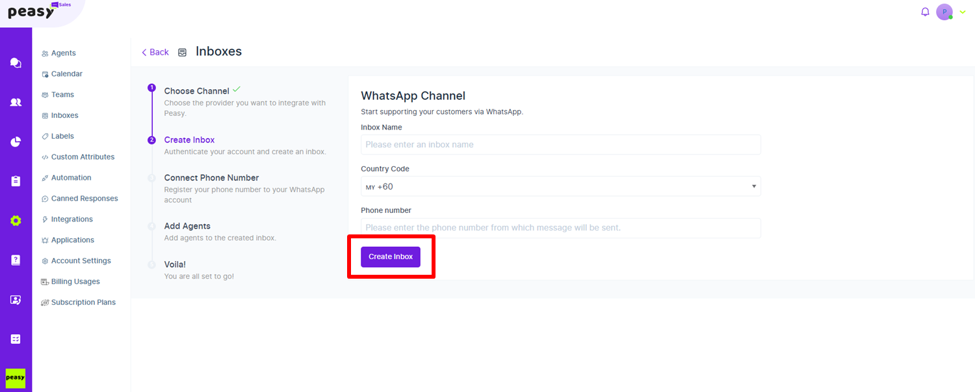
8. After filling in the inbox name and phone number, click “Create Inbox.”
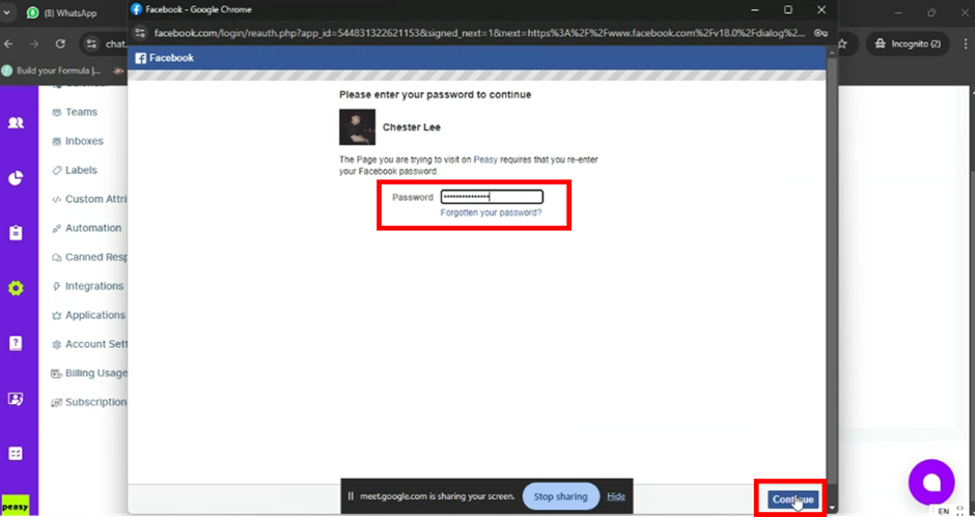
9. A pop-up screen will appear. Please log in to your Facebook account to access the next step. Click “Continue.”
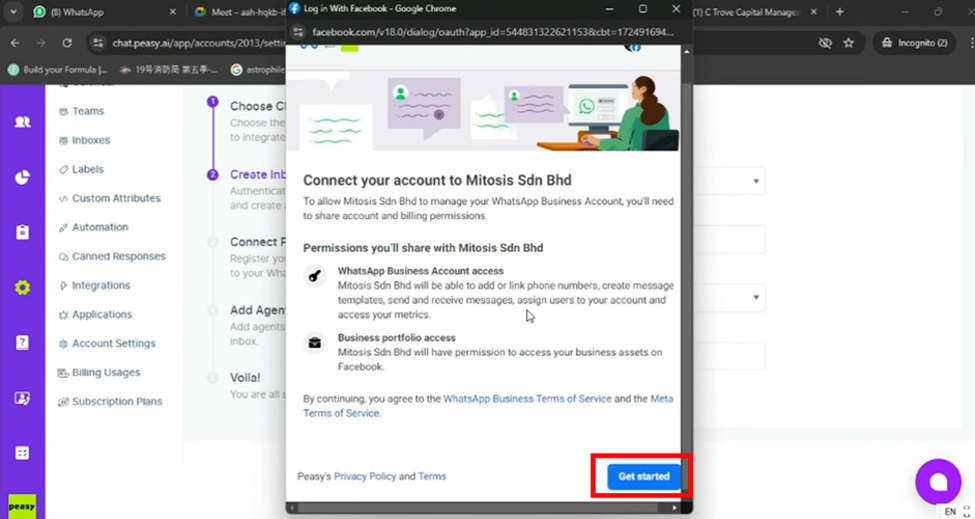
This is the step to connect the Peasy platform with your META platform.
10. Click “Get Started”.
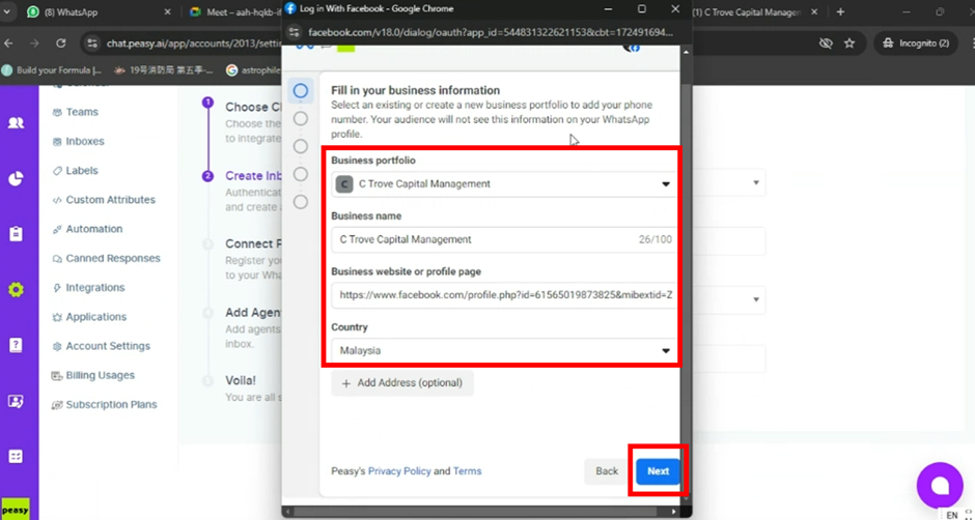
11. Select and ensure that the business portfolio information displayed on this screen is the portfolio that will be used for WhatsApp business communication on the Peasy platform.
Once the information is updated, click “Next.”
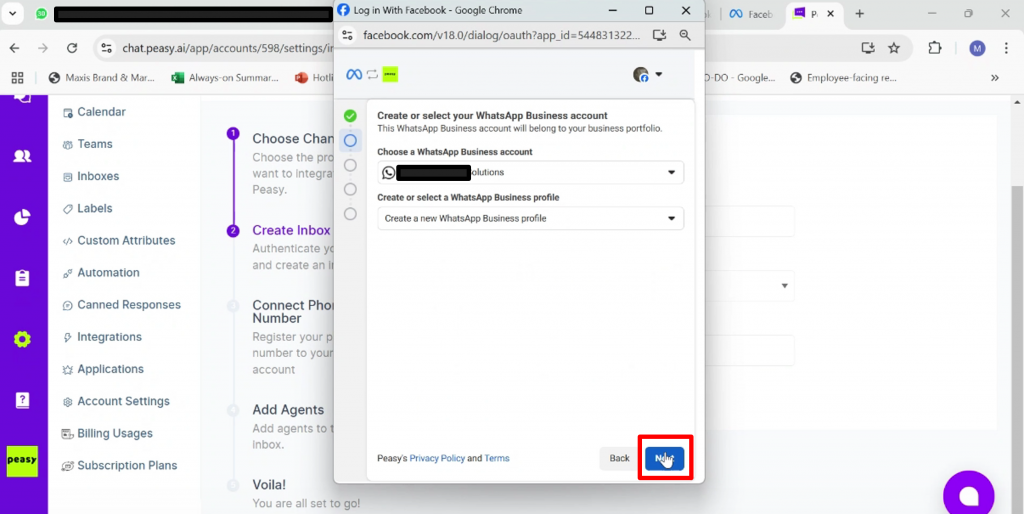
12. Make sure you select your existing Whatsapp Business API profile name for the “Choose a Whatsapp Business Account” selection box.
Next, select “Create a new WhatsApp Business profile” on the second data line.
Click “Next.”
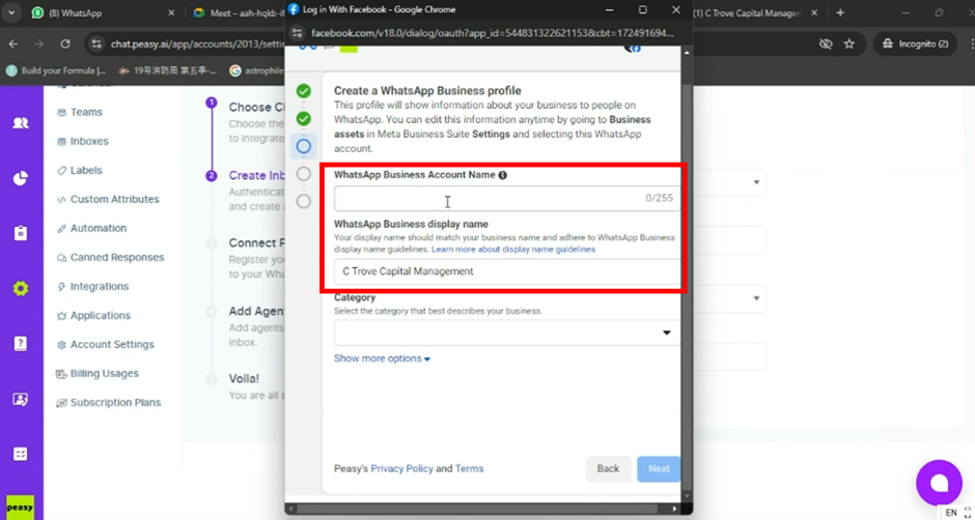
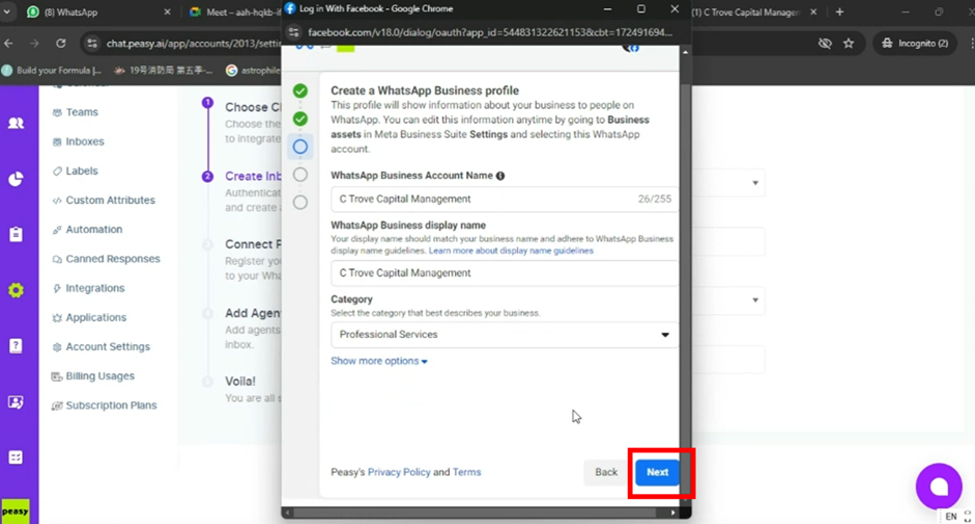
13. Enter your existing WhatsApp Business Account Name. META requires this name to be the same as the WhatsApp Business display name.
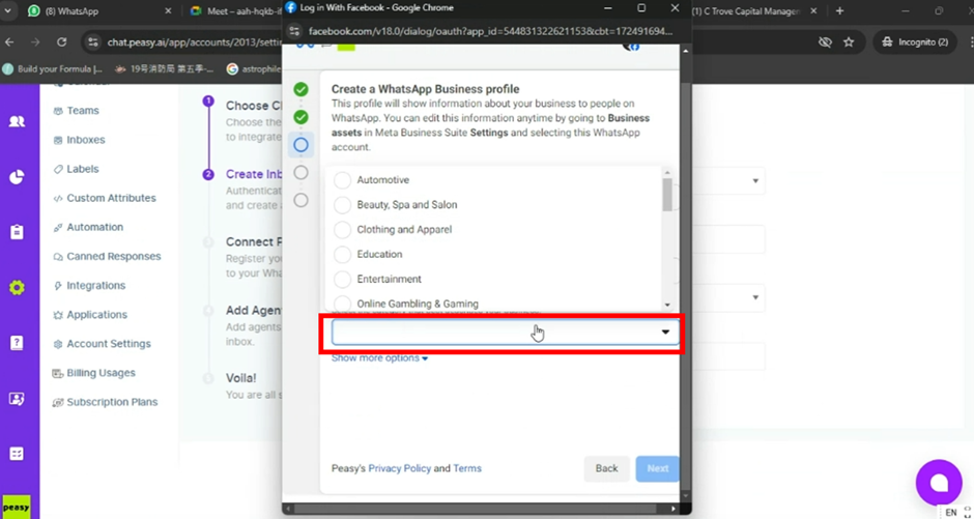
14. Click the downward arrow in the “Category” box. Select the business category that best fits your existing business.
15. Once all the information is filled in, click “Next.”
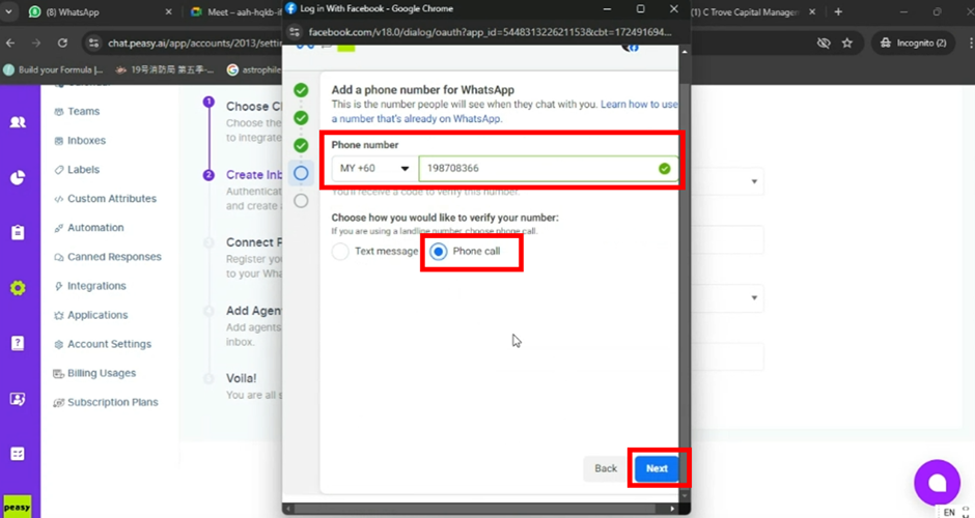
16. Enter the existing Whatsapp Business API phone number. Make sure the phone number entered is active (able to receive calls or messages from other numbers).
Select “Phone Call.” META will send a verification code through the selected medium on this screen.
Click “Next.”
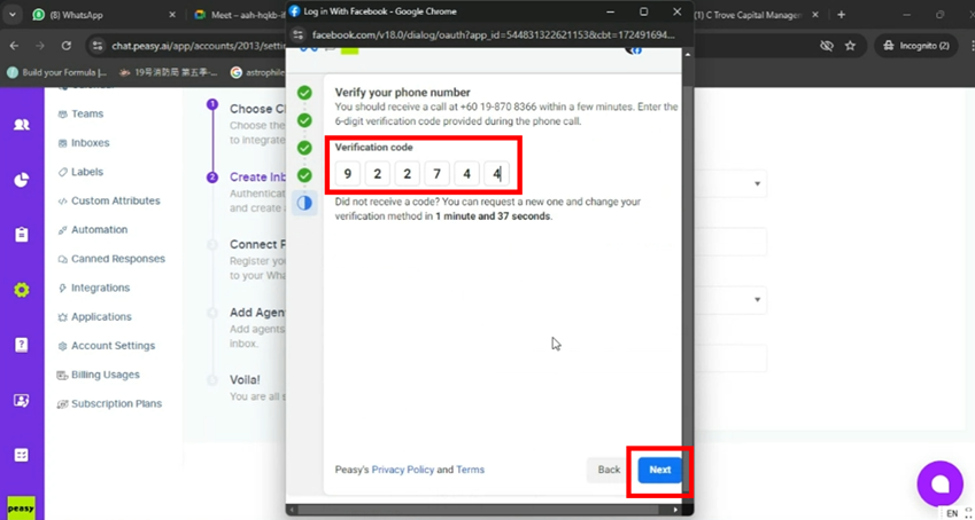
17. You will receive a verification code from META.
Enter the secret code into the system.
Click “Next.”
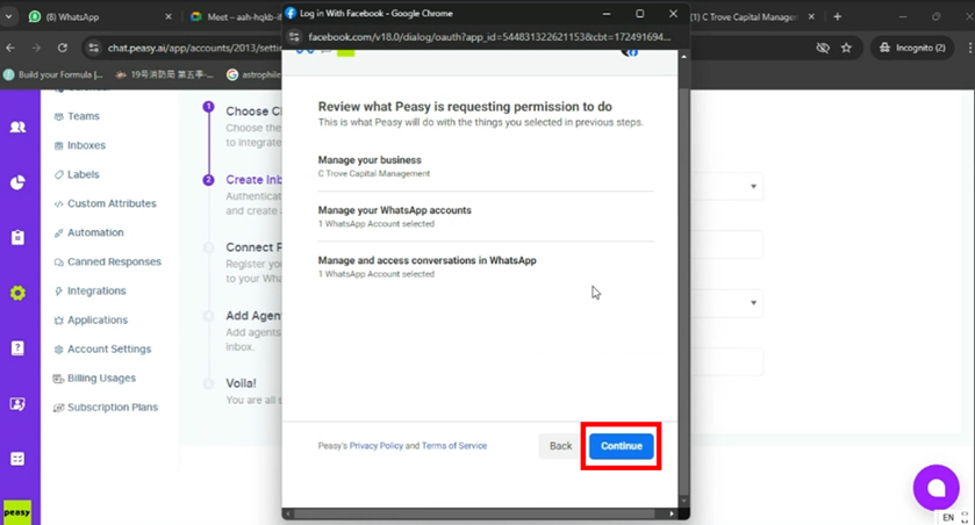
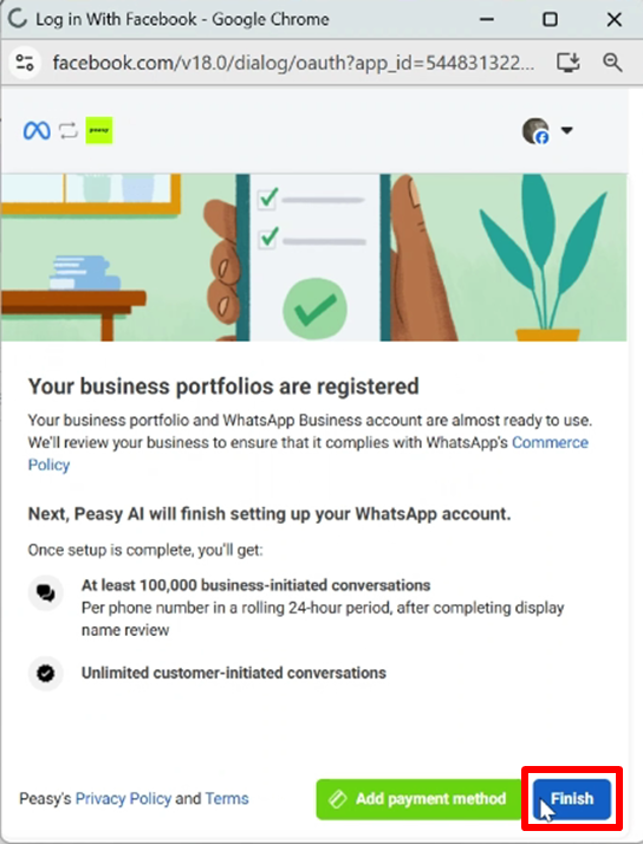
18. Wait a few moments until the next screen appears.
Click “Continue.”
19. Wait a few moments until the next screen appears.
You do not need to add your payment method at this stage.
Click “Finish” to exit the META pop-up and return to the Peasy Sales screen display.
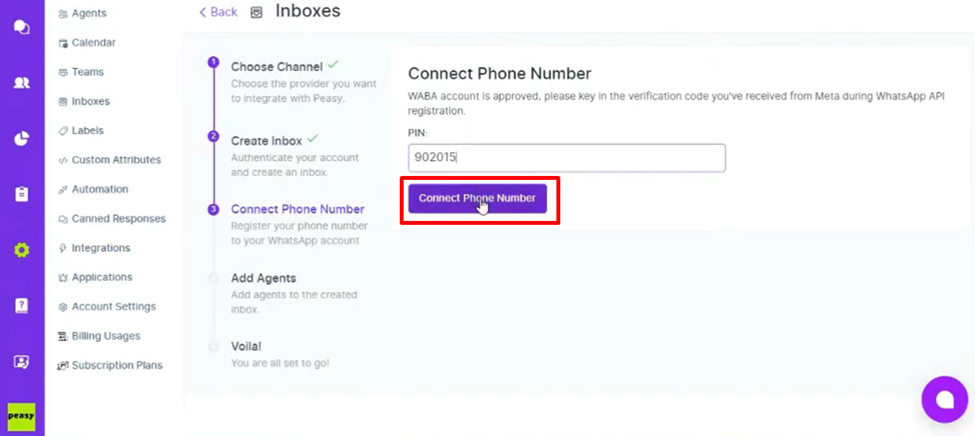
20. Enter the verification code, the same as the one in the previous META platform, in the “PIN” box on the Peasy platform screen.
21. Once the PIN is entered, click “Connect Phone Number.”
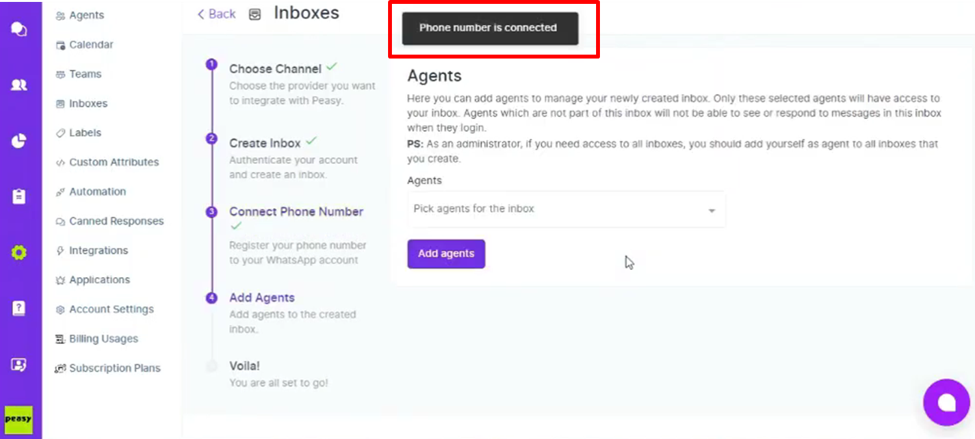
22. The screen will display “Phone Number is connected.”
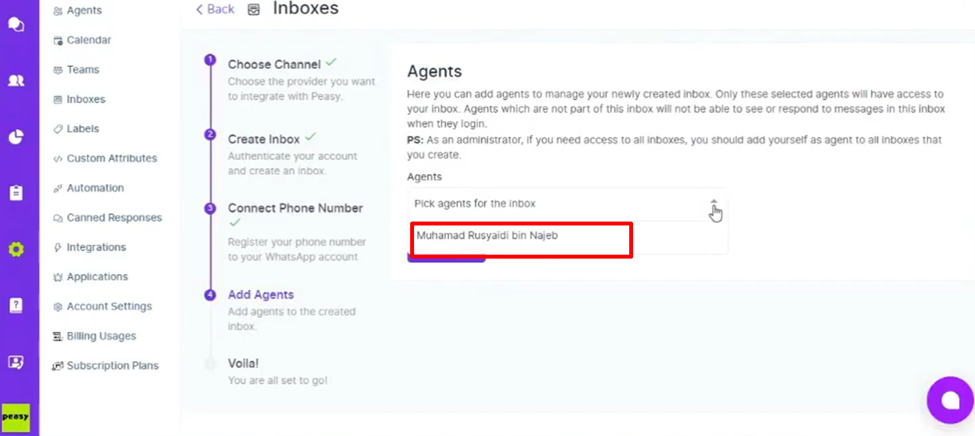
23. Next, you need to add an agent to the inbox.
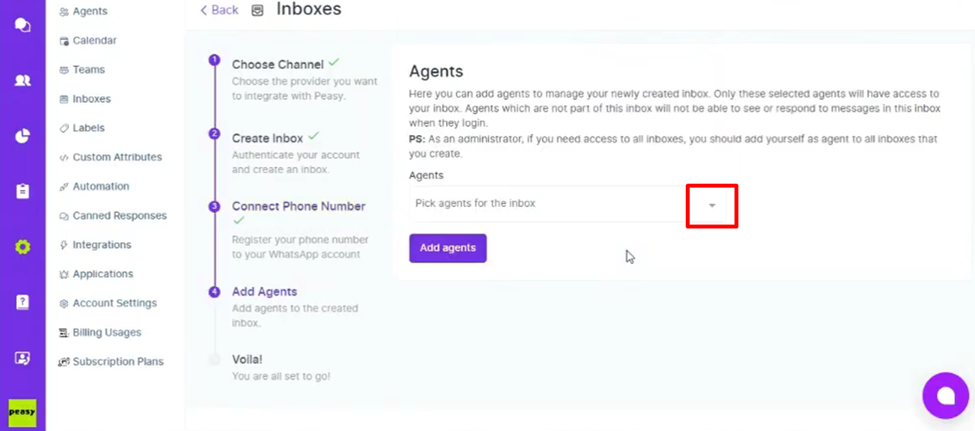
Click the downward arrow on the right side of the “Pick agents for the inbox” box.
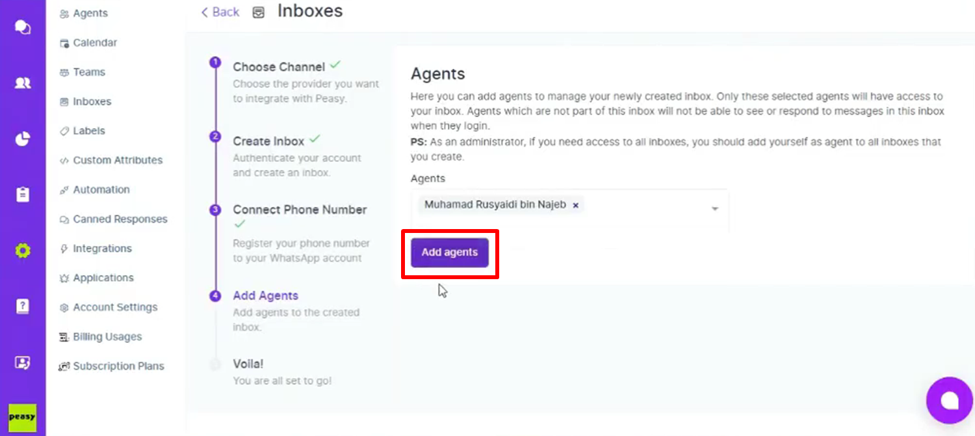
24. Click on the name that appeared on the list, to add the person as an agent to the WhatsApp inbox.
25. Click “Add agents”.
26. Congratulations! you have successfully transfer your existing Whatsapp Business API into Peasy platform.
Currently this function is not available on the mobile app, please migrate your existing Whatsapp Business API account thru your Peasy Sales web application.