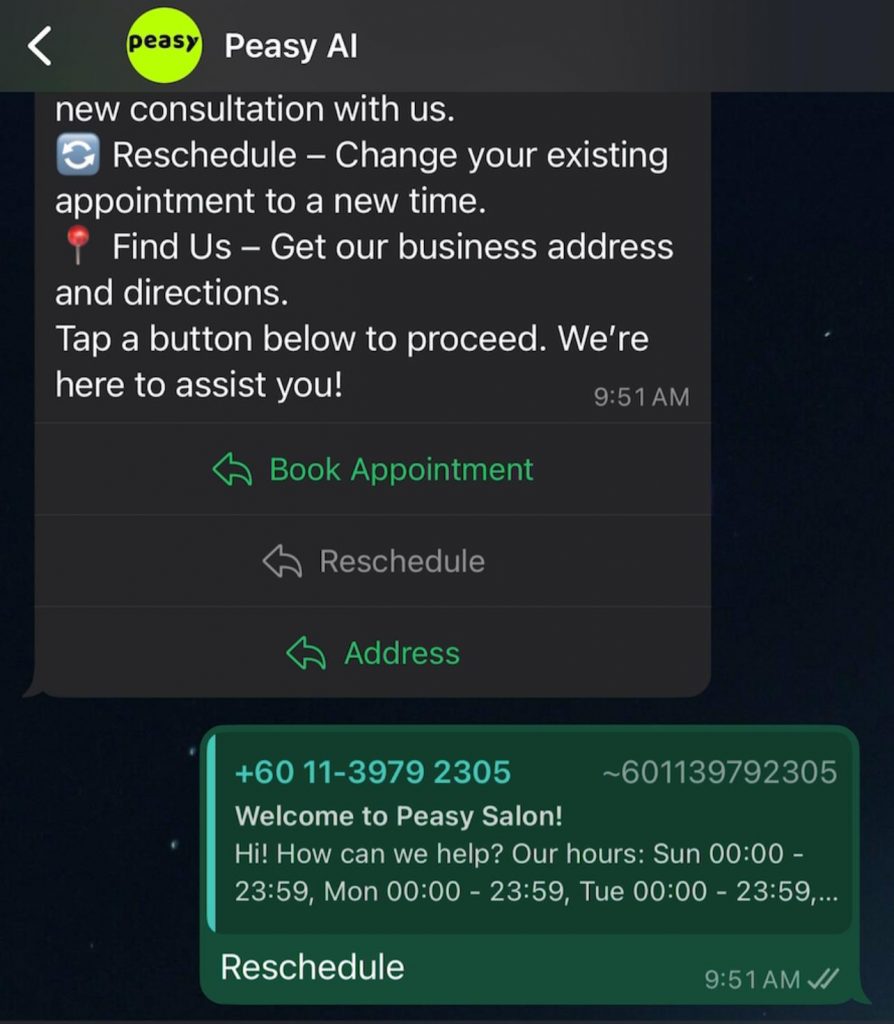

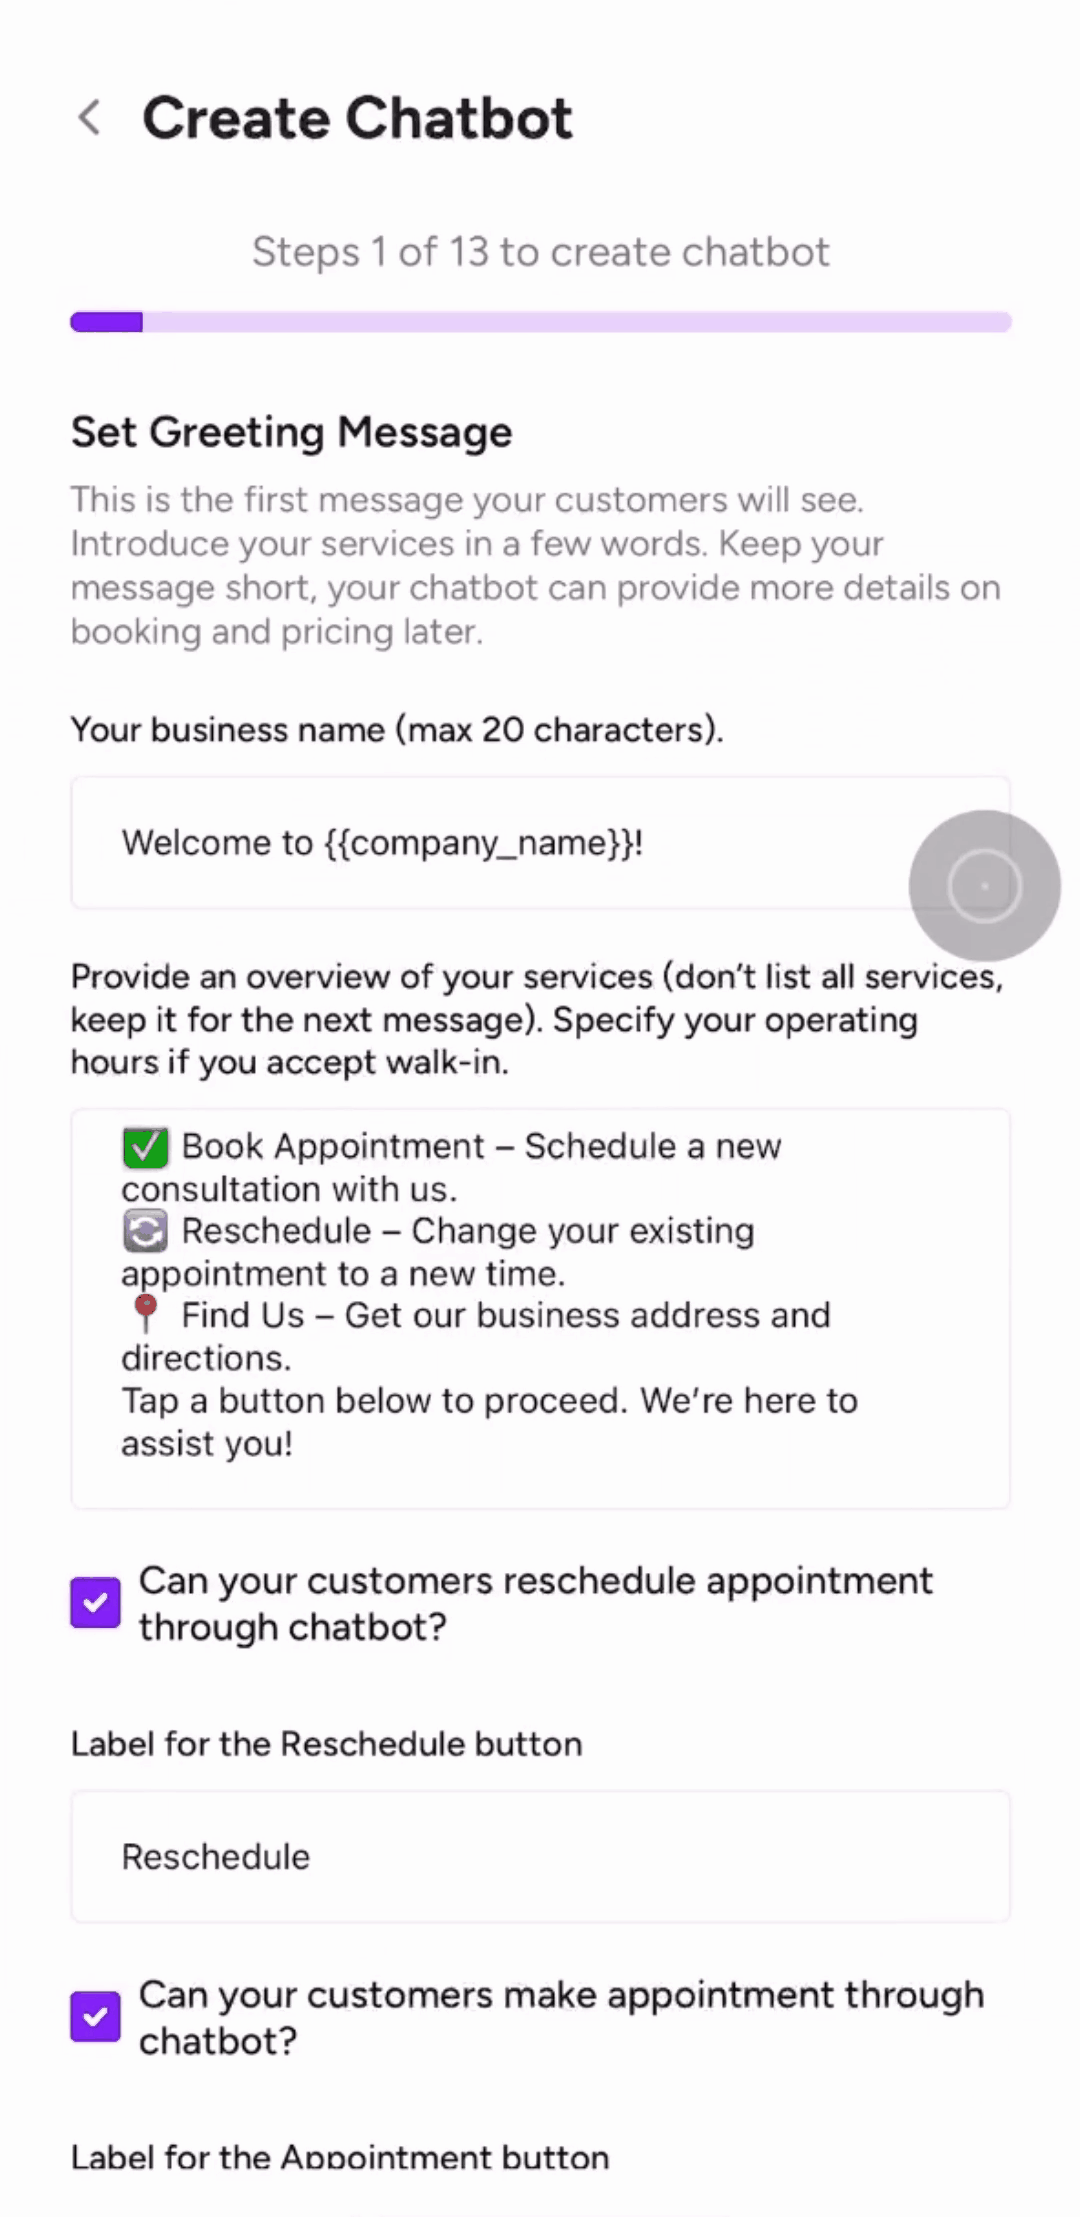
1. Greeting Message – First Impression Matters!
- The greeting message is the first thing customers see when they open your WhatsApp chat. It should:
 Be clear & friendly – Set the right tone for your brand. Provide simple instructions – Guide customers on what to do next. Offer quick options – Reduce unnecessary typing.
  Example Greeting Message:
“Hi! Welcome to [Restaurant Name] . How can we help you today?”
“Order Now | Order Status | Contact Support” Pro Tip: Keep it short and action-driven so customers don’t get overwhelmed. Do not include information about appointments and service here, leave that for the next node. Do remember, you’re having a conversation with your customers – don’t spam and overwhelm them in your first message
- The greeting message is the first thing customers see when they open your WhatsApp chat. It should:
2. Branch list. Peasy will automatically retrieve and list out all of configured branches available for appointments. Your customers can select the branch closest to their location. Include in the body text any information specific to a branch. For example “Our Express branches only offer normal haircuts, please book appointments at our Premium branches if you want hair treatment”.
Do not: include information about pricing, services in the body text. Reserve that information for the appointment list node. Do not list the branches in the body text, Peasy will retrieve and display the list automatically.
3. Appointment list. Peasy will automatically retrieve and list of all the configured services. Your customers can select the exact service they want to procure for their appointment. Include in the body text any information that will upsell your customers, or help them choose the appropriate service. For example: “Extend your massage from 60 minutes to 90 minutes for RM35 extra only”.
Do not include information concerning the specific pricing, service description in the body text. Instead, place service-specific information such as pricing and description within the service link’s description. Click here to learn more
Do not list the services in the body text, Peasy will retrieve and display the list automatically.
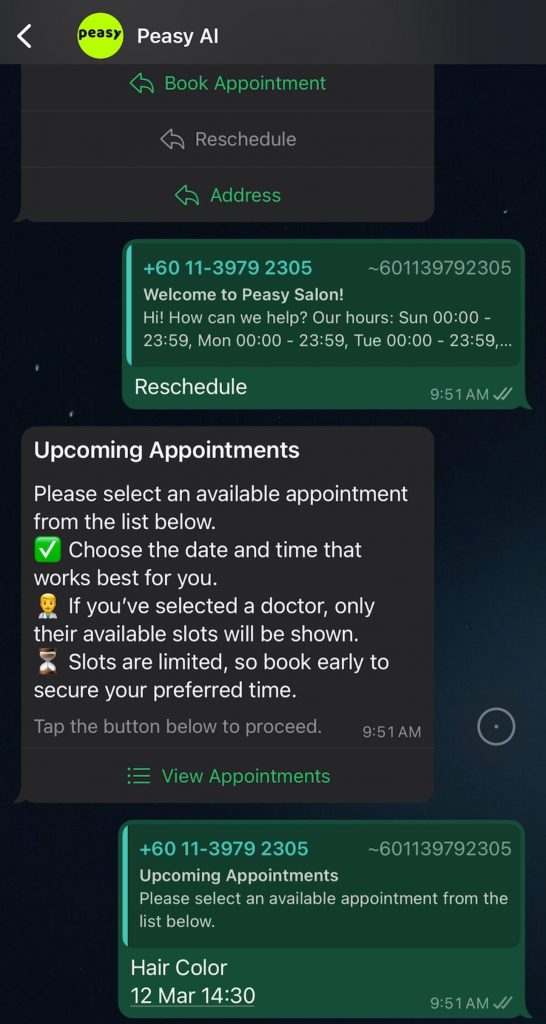
4. Outstanding appointments. Your customers can check information about their appointment directly with your chatbot. Your chatbot will retrieve and list all present and future appointments. Your customer can then select a specific appointment for further information or action (cancel/reschedule)
5. Appointment Details. Provide specific information about an appointment. It will be helpful to include these information in the body text:
- Pre-appointment preparation. Example: “Please bring along your own towel for the swimming lesson”
- Parking/navigation information
- Payment information. Example: “We only accept card, not cash”
6. Reschedule. Your customer can directly reschedule an appointment with a chatbot, without any human assistance from your staff. When a customer selects the reschedule option, the earlier appointment is automatically cancelled. The chatbot will provide a link for the customer to select a new time slot.
Tip: To prevent customers from dropping-off, create a sense of urgency for your customers to quickly reschedule in the body text. Example: “No worries, please select a new appointment slot from here. Do hurry, slots are quickly being filled”.
Tip: Include your rescheduling and cancellation policy in the body text, example: “You can cancel any appointment up to 24 hours before the scheduled time. If you cancel more than 3 appointments within a month, you will not be able to make any new appointments within the next 30 days”.
7. Cancel. When your customer selects the cancel option, the appointment is cancelled and the time slot is free up for other customers.
Tip: Encourage your customers to book again, or ask your customers why do they want to cancel their appointment in the body text
8. What if your customer wants to talk to a human agent? You can turn on the Human Agent function on your chatbot. Learn how Peasy can automatically notify and delegate customer inquiries to the right person in your team here.
9. Empower your chatbot to encourage walk-in. Turn on “Directions” so that your chatbot can provide navigation. Click here to learn how this feature works.
1. Greeting Message – First Impression Matters!
- The greeting message is the first thing customers see when they open your WhatsApp chat. It should: Be clear & friendly – Set the right tone for your brand. Provide simple instructions – Guide customers on what to do next. Offer quick options – Reduce unnecessary typing.
- Example Greeting Message:
“Hi! Welcome to [Restaurant Name]. How can we help you today?”
“Order Now | Order Status | Contact Support” - Pro Tip: Keep it short and action-driven so customers don’t get overwhelmed. Do not include information about appointments and service here, leave that for the next node. Do remember, you’re having a conversation with your customers – don’t spam and overwhelm them in your first message
- The greeting message is the first thing customers see when they open your WhatsApp chat. It should:
2. Branch list. Peasy will automatically retrieve and list out all of the configured calendars available for appointments. Your customers can select the service providers they want from the list. Include in the body text any information specific to a service provider. For example “John and Jim are directors of this salon, their rates are higher than other professionals”.
Do not: include information about pricing, services in the body text. Reserve that information for the appointment list node. Click here to learn more.
Do not list the service providers in the body text, Peasy will retrieve and display the list automatically.
3. Appointment list. Peasy will automatically retrieve and list of all the configured services. Your customers can select the exact service they want to procure for their appointment. Include in the body text any information that will upsell your customers, or help them choose the appropriate service. For example: “Extend your massage from 60 minutes to 90 minutes for RM35 extra only”.
Do not include information concerning the specific pricing, service description in the body text. Instead, place service-specific information such as pricing and description within the service link’s description. Do not list the services in the body text, Peasy will retrieve and display the list automatically. Click here to learn more.
4. Outstanding appointments. Your customers can check information about their appointment directly with your chatbot. Your chatbot will retrieve and list all present and future appointments. Your customer can then select a specific appointment for further information or action (cancel/reschedule)
5. Appointment Details. Provide specific information about an appointment. It will be helpful to include these information in the body text:
- Pre-appointment preparation. Example: “Please bring along your own towel for the swimming lesson”
- Parking/navigation information
- Payment information. Example: “We only accept card, not cash”
6. Reschedule. Your customer can directly reschedule an appointment with a chatbot, without any human assistance from your staff. When a customer selects the reschedule option, the earlier appointment is automatically cancelled. The chatbot will provide a link for the customer to select a new time slot.
Tip: To prevent customers from dropping-off, create a sense of urgency for your customers to quickly reschedule in the body text. Example: “No worries, please select a new appointment slot from here. Do hurry, slots are quickly being filled”.
Tip: Include your rescheduling and cancellation policy in the body text, example: “You can cancel any appointment up to 24 hours before the scheduled time. If you cancel more than 3 appointments within a month, you will not be able to make any new appointments within the next 30 days”.
7. Cancel. When your customer selects the cancel option, the appointment is cancelled and the time slot is free up for other customers.
Tip: Encourage your customers to book again, or ask your customers why do they want to cancel their appointment in the body text
8. What if your customer wants to talk to a human agent? You can turn on the Human Agent function on your chatbot. Learn how Peasy can automatically notify and delegate customer inquiries to the right person in your team here.
9. Empower your chatbot to encourage walk-in. Turn on “Directions” so that your chatbot can provide navigation. Click here to learn how this feature works.
- Tip 1: Include parking directions to improve the dine-in experience.
- Tip 2: Reduce your customer waiting time, include instruction for customers to check their queue status before visiting. Click here to learn more.